How to Fix a Broken Laptop Hinge

How to Fix a Broken Laptop Hinge

Hard 60–90 minutes
How to Fix a Broken Laptop Hinge
Fixing a broken laptop hinge before it cracks the screen or pulls the display cable

Tools & Parts Needed

  • Phillips screwdriver set
  • Plastic pry tools
  • Replacement hinge (model-specific)
  • Spudger
  • Tweezers
  • Magnetic parts tray
Laptop displaying a blue screen during diagnostics on a unit with hinge-related display cable damage
A loose hinge stresses the display ribbon every time you open the lid — untreated, it will eventually cause flickering, no-display, or a cracked LCD.

Step-by-Step Instructions

  1. 1

    Power Off and Remove the Battery

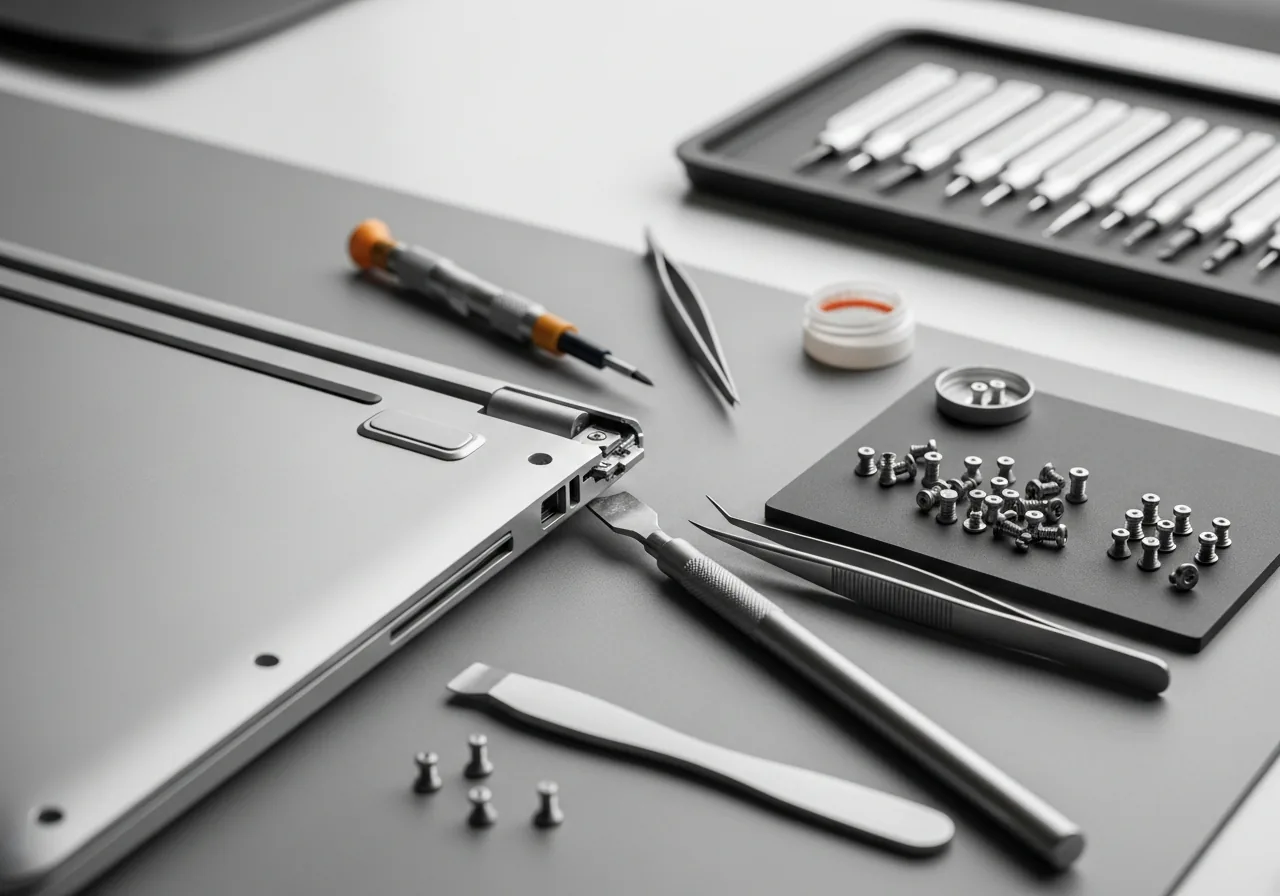
    Power off, unplug from the charger, and remove the battery if accessible from outside.

  2. 2

    Remove Bottom Panel Screws

    Remove all screws from the bottom panel, noting lengths — use a diagram or photo to track them.

  3. 3

    Pry Open the Laptop Casing

    Use a plastic spudger to gently separate the bottom panel from the chassis, starting at a corner.

  4. 4
    Laptop opened with the bottom panel removed showing the hinge mounting points inside the chassis
    Hinges mount through the keyboard deck, not the bottom panel — budget for a near-full disassembly even if the visible damage looks small.

    Locate the Broken Hinge

    Trace the display cable to the hinge area. The broken hinge may have cracked plastic mounts.

  5. 5

    Remove Hinge Screws

    Unscrew the hinge screws from both the display lid and the chassis base.

  6. 6

    Detach the Broken Hinge

    Slide or lift the hinge away from its mount points — the display bezel may need to be partially removed.

  7. 7

    Attach the New Hinge

    Position the replacement hinge in the mount points and drive the screws finger-tight first.

  8. 8

    Tighten All Screws

    Tighten the hinge screws fully — they must be firm but not stripped.

  9. 9

    Reassemble and Test

    Reassemble the casing, reinsert the battery, power on, and test the hinge movement through full range.

Multiple monitors showing system errors after a hinge-related display cable was crimped
Replace BOTH hinges even if only one broke — the surviving hinge is usually weeks away from failing too, and the disassembly is the same.

Safety Warnings

This repair varies significantly by laptop model — find a model-specific guide before starting.

Breaking the display cable during this repair is common — work slowly around cable routing.

Never force the hinge past its natural range of motion during testing.

Related Articles & Categories

Continue learning about Windows Laptops in Computers & Storage, or explore related repairs and learning guides below.